Craftsman Snowblower Leaking Gas. You can find out what is causing your gas to leak from your snowblower by using our symptom and repair guide.
This guide can assist you in finding the right part to replace and includes information related to the following: Valve or cap, carburetor, O-ring, needle, and gasket.
Make sure you unplug the spark plug and empty the fuel tank of your snowblower before working on or replacing any part.
This repair suggestion is meant to be a quick reference guide, but to get more specific information about the repair of your model, consult the owner’s manual.
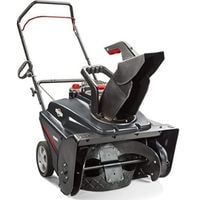
Craftsman Snowblower Leaking Gas
When a craftsman snowblower starts leaking gas, here are several issues to look out for.
Issue With Fuel Tank
The fuel tank on your snowblower stores the main supply of gas for it. When a leak occurs with your fuel tank, gas may leak out at the seams, which are the most common places where this happens with your snowblower’s fuel tank.
Inspect the seams carefully and there will likely be tell-tale signs of gasoline dripping from your tank.
If there are any leaks, replace the entire fuel tank because not only will you be wasting valuable gas which is money down the drain, but leaking gas can easily set off a potentially devastating fire.
Always double-check to make sure that no one is around when doing this because if anyone catches you, they might never give you another moment of peace again.
Problem With Valves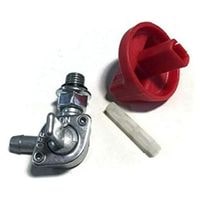
The fuel valve is like the water valve inside your home. It stops the flow of gas to your engine when you don’t need it or allows it to flow freely when appropriate.
You can either turn off this lever or even cut the fuel line entirely if your leak is small and can be handled with a hose clamp.
If you don’t care about replacing your entire valve then look up instructions on removing the valve entirely and then go from there.
Faulty Carburetor
The carburetor might be cracked or it might have been tampered with. This is why when higher values of a variable are present it becomes an issue and the carburetor begins to malfunction.
In case your carburetor has indeed become damaged because of the high intake of people’s energy and feed, you need to look at whether or not there are any damages occurring in the main body.
If the main body is damaged, then you should try and rectify that by re-installing a repair kit through the services of your local mechanic. If all else fails you need to get them to completely replace your vehicle’s engine system altogether as soon as possible.
Defective Fuel Filter
Check the connections to the fuel filter and the filter housing if your snowblower isn’t functioning properly.
If there’s a crack in either of these components, then you’ll need to invest in new parts instead of attempting to just cut off a piece of one of the old pieces and reconnect it with the rest of what is there.
Cracks or dryness can easily happen during use if you’re not careful. It’s better to simply replace any piece if it’s damaged because some of your other fuel lines might also have cracks or defects, too.
Fuel Pump Malfunction
If the snowblower engine leaks gas, fuel may be escaping from a leaky fuel pump. Tighten all fittings and check the pulse lines for damage and abrasion.
Look for pinholes or cracks in the body of the fuel pump. Since fuel is under pressure, it can travel very far before leaking out, so it’s important to check everywhere.
Fuel Shut-Off Issue
Check the fuel shut-off valve for leaks, and make sure that it fits tightly. If a fuel shut-off valve is loose or leaking, replace it.
Also, check that the ends of the fuel lines do not have tears or holes. Replace any leaking fuel lines.
Failed Gaskets
The fuel lines run between the tank and the carburetor; they supply fuel to the carburetor. A leaking or cracked line will cause problems in your engine.
The problem can be resolved by replacing the component with a new one, just as you would with any other part of the fuel system.
Sometimes, you won’t have clamps on your lines, and this can be fixed by simply cutting off two small pieces to cover up any exposed parts and then pushing them onto the connection securely.
Related Guides