How To Install Wood Fence Panels. Wooden fences are used for defining boundaries for a variety of reasons, including seclusion from neighbors and weather protection.
A wooden panel fence is one of the most popular choices for this reason, and it’s also quite simple to install. It’s rather simple, although it does require some upkeep over time, as do many wooden buildings.
Stay with us while we show you how to build a wooden panel fence in your yard, and you’ll pick up a lot of useful suggestions that you can use to make railings or more elaborate walling out of other materials like metal or brick.
How To Install Wood Fence Panels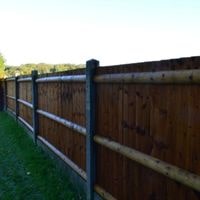
We discuss how to install wood fence panels in this article.
Step 1
Make a hole in the dirt for the first post. This is normally 600 millimeters (2 feet) deep, and the breadth of your spade allows enough concrete to stay in place.
Always use a spirit level to ensure that it is perfectly level with the ground. Backfill the hole with cement, and whatever came out of the hole when you dug it.
Step 2
Using a measuring tape, pour gravel into the post-hole. Put a 4-inch level or less on the table. Remove the tape when the gravel reaches the 4-inch mark and press down and smooth the gravel using one of the wood tamping tools.
Then go on to the next post hole and repeat until all five post holes have been completed.
Step 3
Brace the posts in the post-holes with scrap two-by-fours before filling them. Use a laser level or engage a professional to help you confirm that each post is plumb before moving on to the next step of your building project.
Make sure to allow enough time for the concrete to dry once it has been poured and smoothed in all of the holes. Typically, this entails wetting down the fresh concrete and allowing it to sit for 20-40 minutes.
Step 4
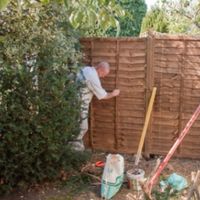
Lift and position a fence panel between two posts with the assistance of your helper. To raise the fence panel to the required height, place blocks of wood beneath it.
Make sure both sides of the fence panel are in contact with the posts, but not too tightly so that they can’t move.
Step 5
Using screws, fasten two fence panels to the posts. Driving screws through the sides of the fence panels that are fastened to the posts is a simple way to do this.
To ensure that each panel is securely fastened, use four screws per panel. This must also be done for the remaining fence panels.
Step 6
If you’re using cedar posts, but not fence panels or railings, staining isn’t necessary because cedar is naturally resistant to the weather.
If you want to stain and finish your fence, you should use latex or oil-based chemicals and apply them with rolling or brushing techniques.
Allow plenty of drying time before coloring your new fence if you’re using pressure-treated or green-treated wood to minimize discoloration and warping.
FAQs
Is it possible for me to install a wood fence myself?
A fence can usually be erected in one to three days by specialists, so if you need it right away, you may have to pay extra.
You can rest and allow skilled specialists to take care of the fence installation instead of spending time on research, planning, and hours of hard effort.
Is it better for a fence to be level or to follow the ground?
A level lot, on the other hand, is ideal if you want to erect the fence more easily, making this option better for DIY beginners. Consider leveling your yard if it has a minor inclination.
If your site has more dramatic hills and valleys, however, attempt to make use of the natural terrain by using regular-height wood posts and picket panels to handle grade fluctuations.
Related Guides
