Kenmore dryer won’t start. Kenmore dryers are a household appliance that most people think about when needing an easy way to get clothes, sheets, and towels dry. Kenmore dryers can play a vital role within a household that the owner takes great care in maintaining over its lifetime.
Like most things, though, it’s not always going to work perfectly. For the best possible results with your Kenmore dryer, you will want to avoid getting it wet and ensure it has been used properly all throughout its lifespan.
While perfect maintenance is out of possibility sometimes, there are ways you can fix it when trouble arises so you don’t have to worry about what will happen after trying multiple repair attempts yourself.
This way, you can move on to having a happy and productive life once more.
Kenmore dryer won’t start
Why Kenmore Dryer won’t start, the thermal fuse is a safety device designed to protect the dryer from overheating.
When the dryer fails to respond, the start switch isn’t at fault. If it doesn’t hum at all, then it could be due to the start switch malfunctioning.
A thermistor or Thermal Fuse
The thermal fuse is responsible for breaking the circuit when the temperature within the dryer gets too high. In order to achieve this, the fuse itself breaks once the temperature reaches a boiling point of 204 degrees Fahrenheit.
This is quite an extreme temperature, so chances are you’ll never have to replace it, but this isn’t a replacement you should forget about.
If your dryer no longer seems to be functioning properly and you aren’t sure why, don’t hesitate to take it in for inspection. After that, you’ll be able to find any broken parts and replace them with new ones.
Defective Drive Motor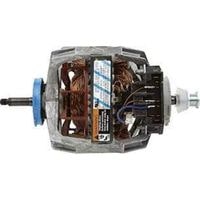
A drive motor rotates the drum in the dryer, and it also makes the fan blades over the vents spin. If you find that there is no air coming out of your vents, then the drive motor may need to be replaced.
The drive motor will have a black metal piece at its center, so it probably won’t be all white like other parts. It’s located toward the front of your dryer, right next to the belt, so you may need to move things out of your way before replacing it.
You will need to remove both sides of the dryer cabinet as well as lift off the top in order to disconnect the drum from everything else.
Faulty Door Switch or Latch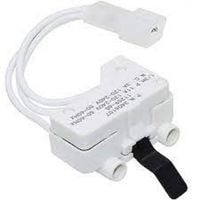
Kenmore dryers are designed with a safety mechanism that will prevent the machines from running when the door is open.
Thus, when you encounter issues with your Kenmore Top Load Washer, it might be because the door switch isn’t working correctly or maybe even because its door latch has been damaged during use.
In order to access and replace either of these parts, you should first remove the top of the machine as each is accessed differently.
If your Kenmore front load washer has a faulty latch, there should be noticeable marks where it used to close properly but can no longer be due to damages caused by usage.
A potentially faulty door switch/circuit board must be tested for electrical continuity using a multimeter for results to be conclusive if it’s defective or not.
Start Switch issue
It is pretty rare, but sometimes the start switch is defective, and that can be the culprit. You will need to get inside your dryer in order to test it using a multimeter.
To get inside your dryer, you have to start by removing the faceplate covering the switch, which can be done by removing two screws typically concealed behind two plastic caps on the outside of the faceplate.
Once you have removed these screws, pull off the front panel so that you are able to access the wires connected to your start switch.
Now check for continuity with your multimeter. The voltmeter should register some electrical flow across all pins when testing if they are wired correctly.
Heating Element
The heating element is part of your dryer’s electrical circuit. As electricity passes through it, this causes it to heat up, which in turn heats the air flowing into the dryer to help clothes dry.
If your heating element is faulty, this can cause the whole circuit to be short out, making the breaker trip. First, you need to find out if your heating element has gone bad by opening up the back panel of your dryer and removing the electrical wires connected to it.
This will let you test whether or not they are short-circuiting. Make sure you have turned off your power before doing this! Once removed, see if there are any broken wires that could be causing this error.
Timer problem
The timer may be malfunctioning, but it’s rare. Before replacing the timer, test all the other components to confirm that they aren’t working, and if everything checks out, you can measure the timer and consult a wiring diagram. If the timer is faulty, replace it.
Power Cord fault
A damaged power cord can short-circuit a dryer. If this occurs, it could be because a component in the power cord has been compromised and will need to be replaced before using the dryer again.
Though there may also be visible signs of damage, such as burn marks or discoloration, which would indicate that the cord needs to be removed from service.
If this is discovered at any point during a repair after removing the power cord from its outlet, immediately replace the wire with an intact one before restarting.
If you encounter any abnormal behavior when attempting to restart after removing a damaged wire, consider checking control or circuit board wires for abnormalities or shorts immediately before continuing with a shorted wire in a different area of your appliance.
Defective Main Control Board
It is rare for the main control board to be defective. Occasionally, it happens. Make sure that all other components are working properly before ordering a new main control board.
Having determined that all other components are in good working order, you should probably replace the main control board. Although the control board cannot be easily tested, you can look for signs of burning or shorted components.
Related Guides