Maytag Dryer Won’t Start. There’s never a good time for your dryer to break down. By becoming familiar with how these appliances work, you can prevent this from happening.
First troubleshooting should include some simple checks on whether everything works properly.
In order to troubleshoot and determine what is causing your problem in the first place, refer to our handy guide below, and together we can get your dryer up and running again in no time.
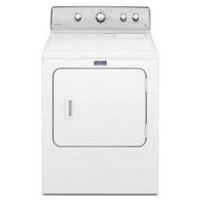
Maytag Dryer Won’t Start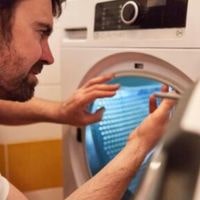
Here we will discuss some common issues and solutions for Maytag Dryer Won’t Start.
Faulty Start Switch
To find out why your dryer isn’t turning on, try pressing the button. There may be something wrong with the interface if the machine begins to run but does not heat up.
If no response is given and it makes no noise, there may be a more serious problem – like the start switch! Using a multimeter will help you to verify whether or not the issue is with the start switch and if so, you can replace it with a new one.
Defective Drive Motor
Air is exhausted by turning the drive motor and the blower wheel. You should check the thermal fuse, the start switch, and the door switch before replacing the motor.
If all three of those parts are functioning well with no problems, but you still hear a humming noise coming from it when the machine is turned on, remove the belt from the motor and check over the blower wheel for anything that might be obstructing it.
If there’s nothing blocking it, it may very well be broken-in which case there’s no other option but to replace it instead.
Belt Switch Faults
If the main drive belt breaks on most dryers, the motor will still operate and the drum may or may not rotate. However, some clothes dryers have a switch attached to the vulnerable parts of drive belts and if it malfunctions, then it could be harmful.
The first thing to do is verify that you can hear a hum while trying to start up your dryer – this indicates that your switch has not been disabled by accident. Next is to locate your model number and search for how equipped it is with a main-belt switch.
If it does have one installed, use a multimeter to test for continuity (the ability for current to flow freely through something) in order to determine whether or not the current path is still intact so you can then proceed with replacing it if needed.
Main Control Board Failure
The main control board is usually not the first part to suffer damage or fail. Before replacing it, check that you haven’t overlooked a more likely cause of failures such as a faulty I/O card or bad power supply.
The main control board should be replaced if all other components are functioning properly. It cannot be easily tested, but you can inspect it for burned-out components or signs of overheating.
Timer Defects
The timer might be the issue. It’s often a good idea to test the more commonly defective parts before replacing it entirely.
If everything works great apart from the timer, re-check and recheck if you forgot anything by using your wiring diagram and a multimeter (to see if there is power flow).
If it turns out that the fix was quick and easy, consider reviewing the timer and not replacing it at all–but only when you are certain that there is no fault in any other component.
Faulty Thermal Fuse
A thermal fuse serves to protect the dryer against overheating. This device is often located at the blower housing or on the heating element in electric models. In both cases, continuity means it is closed; that there is an electrical path through it.
When the fuse becomes too hot, it will open, meaning the electrical circuit will be broken and the fuse has “blown.
If a thermal fuse does not function properly, you can use a multimeter in order to check for continuity of the thermal fuse, an indication of its resistance when tested in Ohms.
A blown thermal fuse indicates poor venting and should always be addressed whenever replacing one!
Related Guides