How long does it take for wood filler to dry. The use of filler is voluntary. Stain works fine without it as do varnish, polyurethane, shellac, and lacquer.
Filler is an aid to a glassy, consistent finish. It helps fill and flatten any big pores in the wood.
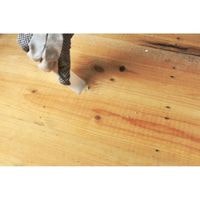
Proper use of filler does require specific drying times before sanding or staining can take place, otherwise, you wind up with orange peel effects if the dry filler around your nail heads gets scuffed off when you go to work on the next.
How long does it take for wood filler to dry
If you’d prefer, you may also opt to use a wood filler as opposed to painting.
A wood filler/putty will take at least 30 minutes to harden, but we suggest an hour or even more just to be safe.
Make sure it’s fully dry before sanding. After you’ve allowed the wood filler to dry for an appropriate amount of time.
You can then resume sanding your table using the same technique used above in this article.
Remember that after sanding, make sure there’s no debris left in the grooves of the table so that you can put some primer or paint down before laying a new top.
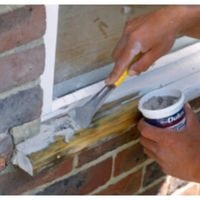
Applying thin layers of filler
Applying thick layers will take a lot of time. However, you may notice the thin layers on your wood usually, the ones with the least imperfections drying up faster or they tend to be much smoother than others.
Applying thin layers first (before thicker ones) is one way of perfecting your technique while not wasting or spreading unnecessary filler (since thinner layers are applied more often, there’s less chance of having to do so).
Although this will dry up filler quicker, it can be troublesome if a lot of it needs to be filled in. On the other hand, you may use more time than necessary if you apply a thick layer that takes some time to harden.
So make sure you assess your project and find out if one thin layer after another will work just as well as one thick spread.
Consider what is best for your project and decide on the type of application that works most efficiently for you based on what type of filler has been used.
Make sure you don’t waste filler only use what’s required because it can get quite expensive so make sure the process goes quickly by using all of the supplies available.
Cleaning Up The Area

There are some people who won’t listen no matter how many times we tell them to clean up the debris after a long day of landscaping.
They may have been working hard at doing something else and finally have time for the fill job.
They impatiently use a power washer and hose them down immediately.
A result is a place in which you get the now-dry top layer, but the base is still wet beneath your paint job.
That’s why we recommend not spray painting on dry ground. Dirt and debris will slow down the process no matter what product you use, whether it be water-based or oil-based materials.
Use a damp cloth and some sandpaper (in small areas!) to make sure the surface is clean.
For holes, go in with a screwdriver or plug cutter whatever fits properly into your hole should clear out any foreign objects there! And what do you know yes, it will increase drying time.
Use hardeners
Some people like to add long-term hardeners, called curing agents and accelerators, that can improve the strength of their fillers.
However, you may be one of many who opt not to add cure initiators because they are not fond of the smell or simply don’t mind waiting a long while for their projects to dry.
Regardless of your choice, it’s generally easier to paint over cured filler than uncured filler. Plus, curing agents can make fillers more likely to crack if too much is added.
When working with resins in order to ensure your finished product remains intact in the long term.
Getting it warmed up
Homes with central heating are ideal places in which to dry wood. If you don’t live in a place that gets a lot of sun shining, do not attempt to dry your wood within the day.
Instead, try scheduling your creations for the summertime. You can leave your forest products out in the open thanks to the heat.
Use hairdryers if you’re indoors and pointed cooling fans at them if necessary (this is not much but it will work quickly).
Put sand in it
The last option is to sand. You can continue if the filler sticks to your sandpaper and you have an exceptionally steady hand.
Keeping a hairdryer blowing directly on the spot (even better since it directs airflow) may help the wet filler to dry up more quickly if the project is left outside under the sun.
Related Guides